Tigress will be installed in /usr/local/bin/tigresspkg and links to the tigress binaries
will be added to /usr/local/bin:
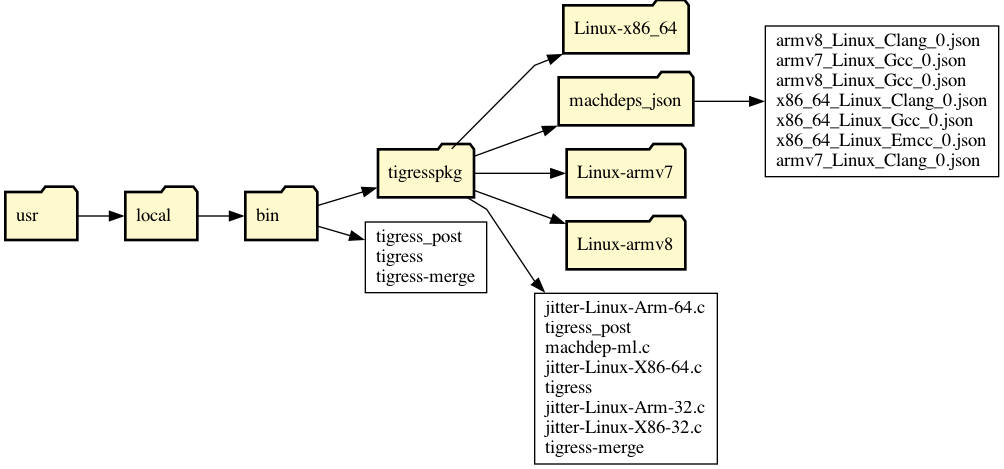
You can run a simple installation check:
> /usr/local/bin/tigresspkgVERSION-NUMBER/check.sh
Version 0-3 installation: Download the relevant .zip-file. Unzip and store the directory
in the location of your choice. Add the distribution's version directory to your PATH,
by adding these lines to your shell startup file (.bashrc, .zshrc, .profile, etc, depending on your shell):
export TIGRESS_VERSION=4.2
export PATH=$PATH:/Users/alice/tigress-install/bin/tigress/$TIGRESS_VERSION
Running on Linux
The interface to Tigress changed from Version 3 to 4. In Version 3, the "--Environment=..."
option was mandatory, and to specify the path to a compiler you would use the ''--gcc=..." option:
> tigress --Environment=x86_64:Linux:Gcc:4.6 ...
> tigress --Environment=x86_64:Linux:Gcc:4.6 --gcc=PATH-TO-COMPILER ...
In Version 4, the "--Environment=..." option is optional (we derive the platform from
reasonable assumptions about the current environment), and to specify the path to a compiler you
use the "--Compiler=..." option:
> tigress ...
> tigress --Environment=x86_64:Linux:Gcc:4.6 ...
> tigress --Environment=x86_64:Linux:Gcc:4.6 --Compiler=PATH-TO-COMPILER ...